Cara Menggunakan Linux Mint Bagi Pemula
ImageMagick – Adding Text to an Image
According to ImageMagick themselves, adding a piece of text to an image is not only one of the most basic operations but also one of the most common uses of ImageMagick. Further, there are a few reasons why you would annotate your image:
- You may wish to add information about the image.
- You may wish to point out something about the image.
- You may wish to copyright the image.
In this tutorial, we’ll be learning how to add text to an image.
Installing ImageMagick
We will need ImageMagick for this process, so first let’s install it:
Append
In the simplest case, you can use the append switch to append a text image to an initial image.
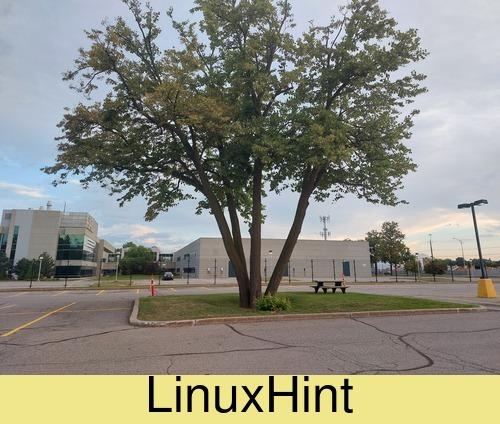
background: color of the background of the text image. Here, it’s khaki.
point size: the point size of the font. Here it’s 50.
gravity: is used to describe where the text will be placed. In this case, I’m using Center to place the text at the center of the image. Choices for gravity include NorthWest, North, NorthEast, West, Center, East, SouthWest, South, and SouthEast.
label: used to annotate an image
append: used to join current images (in this case, the text image to photo44.jpg)
code002.jpg: name of the output image
If on the other hand, you wanted the text in the upper section of the image, you’d use +swap.
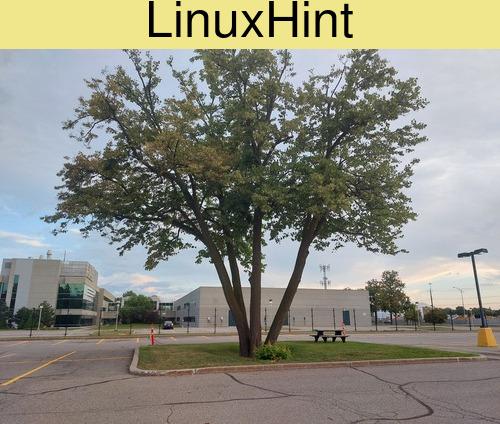
As you may have noticed, the append switch merely joined two images. It didn’t technically write on top of the original image. It took the text image and merged it at the top or bottom of the initial image.
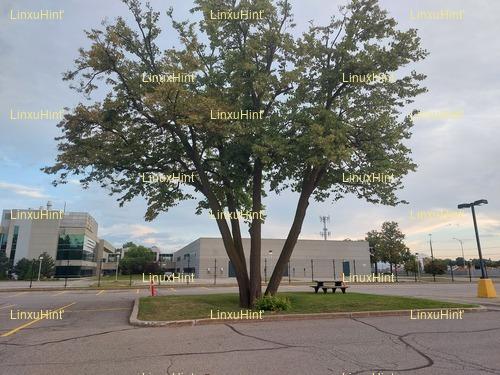
Adding text on an image
Unlike creating text images, you can add text to an existing image on top of it. But note that we must start somewhere and that we require an initial image to add text to it. In this case, I’ll use an initial image called photo44.jpg.

Here, you should know most of the terminology. There’s only one that’s new – the annotate switch. Annotate is used to annotate an image with the text of your choice.
But as you might noticed, there’s a little flaw in what we just did (previously). We couldn’t specify a specific location on the canvas for the text. So how do we fix that?
![]()
Where tx and ty are offet values that are relative to the -gravity setting. If tx and ty are omitted, then it places the text by default to the top left corner.

Alternatively, you can also use the draw switch:


Here, the draw switch is used to annotate an image.
So, what’s the difference between these? Draw allows you to basically add a piece of text at a given location on an existing image. But Annotate allows you to add text onto an existing image/canvas but it also allows you to rotate texts, shear texts, and etc.
Watermark
A watermark is typically placed to show possession – this photo belongs to so and so.
The simplest way of watermarking according to ImageMagick is to overlay an image on top of another image.
Let’s first create our base image:
![]()
Now, let’s composite it.

Geometry is used to specify the location. Image2.2.jpeg is the little image with LinuxHint on it, photo44,jpg is the background image and composite.jpg is the composited image.
Now, let’s look at copyrighting images.

Ok, so it works. Let’s start dissecting the code:
Suppose that we replace miff:- with output.jpg and that we remove what comes after the pipe symbol. This is what we would get:

The latter is 140×80. We have the word LinuxHint written twice. But the real code doesn’t have output.jpg but instead has miff:-. So, what’s this miff:- ?
miff:- : miff is a format just like jpeg, jpg, png, etc. So, it’s like saying save it as a miff and name it -. Yes, that little bar (-) replaces the name output.jpg
Next, we pipe what we’ve create to the composite command. Composite just means overlap one image on top of the other.
We also use the tile switch. This will tile the image and the little dash (-) stands for the image that was previously created (the two LinuxHint). So, overlay the piped image and tile it. Chuck out a composite image called watermark.jpg.
But it doesn’t have to be miff format. In this case, it’s in png:
In the latter case, I chose to use the png format and it worked just fine as well.
The most common use of ImageMagick is for annotating images – to add text to an image. Images can be annotated for various reasons according to ImageMagick, but one of the main reasons is copyrighting it. In this tutorial, we learned how to add a piece of text onto an image. This is just the basics mind you! It can be as crazy as you want. You can add a multi-line text, you can change colors, fonts, locations, etc… Either way, ImageMagick offers you a way to annotate your images in a single line of code, which in my opinion is great! No need to buy Photoshop anymore, use ImageMagick instead – it’s free, and very quick!
Happy Coding!
Tidak ada komentar untuk "Cara Menggunakan Linux Mint Bagi Pemula"
Posting Komentar